
Step-by-step guide on how to join LeveX Quests, track your progress through tier advancement, and claim Surprise Drop rewards to maximize your trading experience.
This guide will walk you through participating in your first Quest and claiming rewards as you progress through different tiers.
Requirements Before Starting
- A registered LeveX account (How to register an account on LeveX)
- Funds in your trading account for volume-based Quests (How to deposit funds into your account)
- Basic understanding of LeveX Quests and Surprise Drop rewards
Step 1: Navigate to the Quest Dashboard
Go to the LeveX homepage and hover over "Feed" in the top navigation menu, then click "Quests" from the dropdown. Alternatively, navigate directly to LeveX Quests.

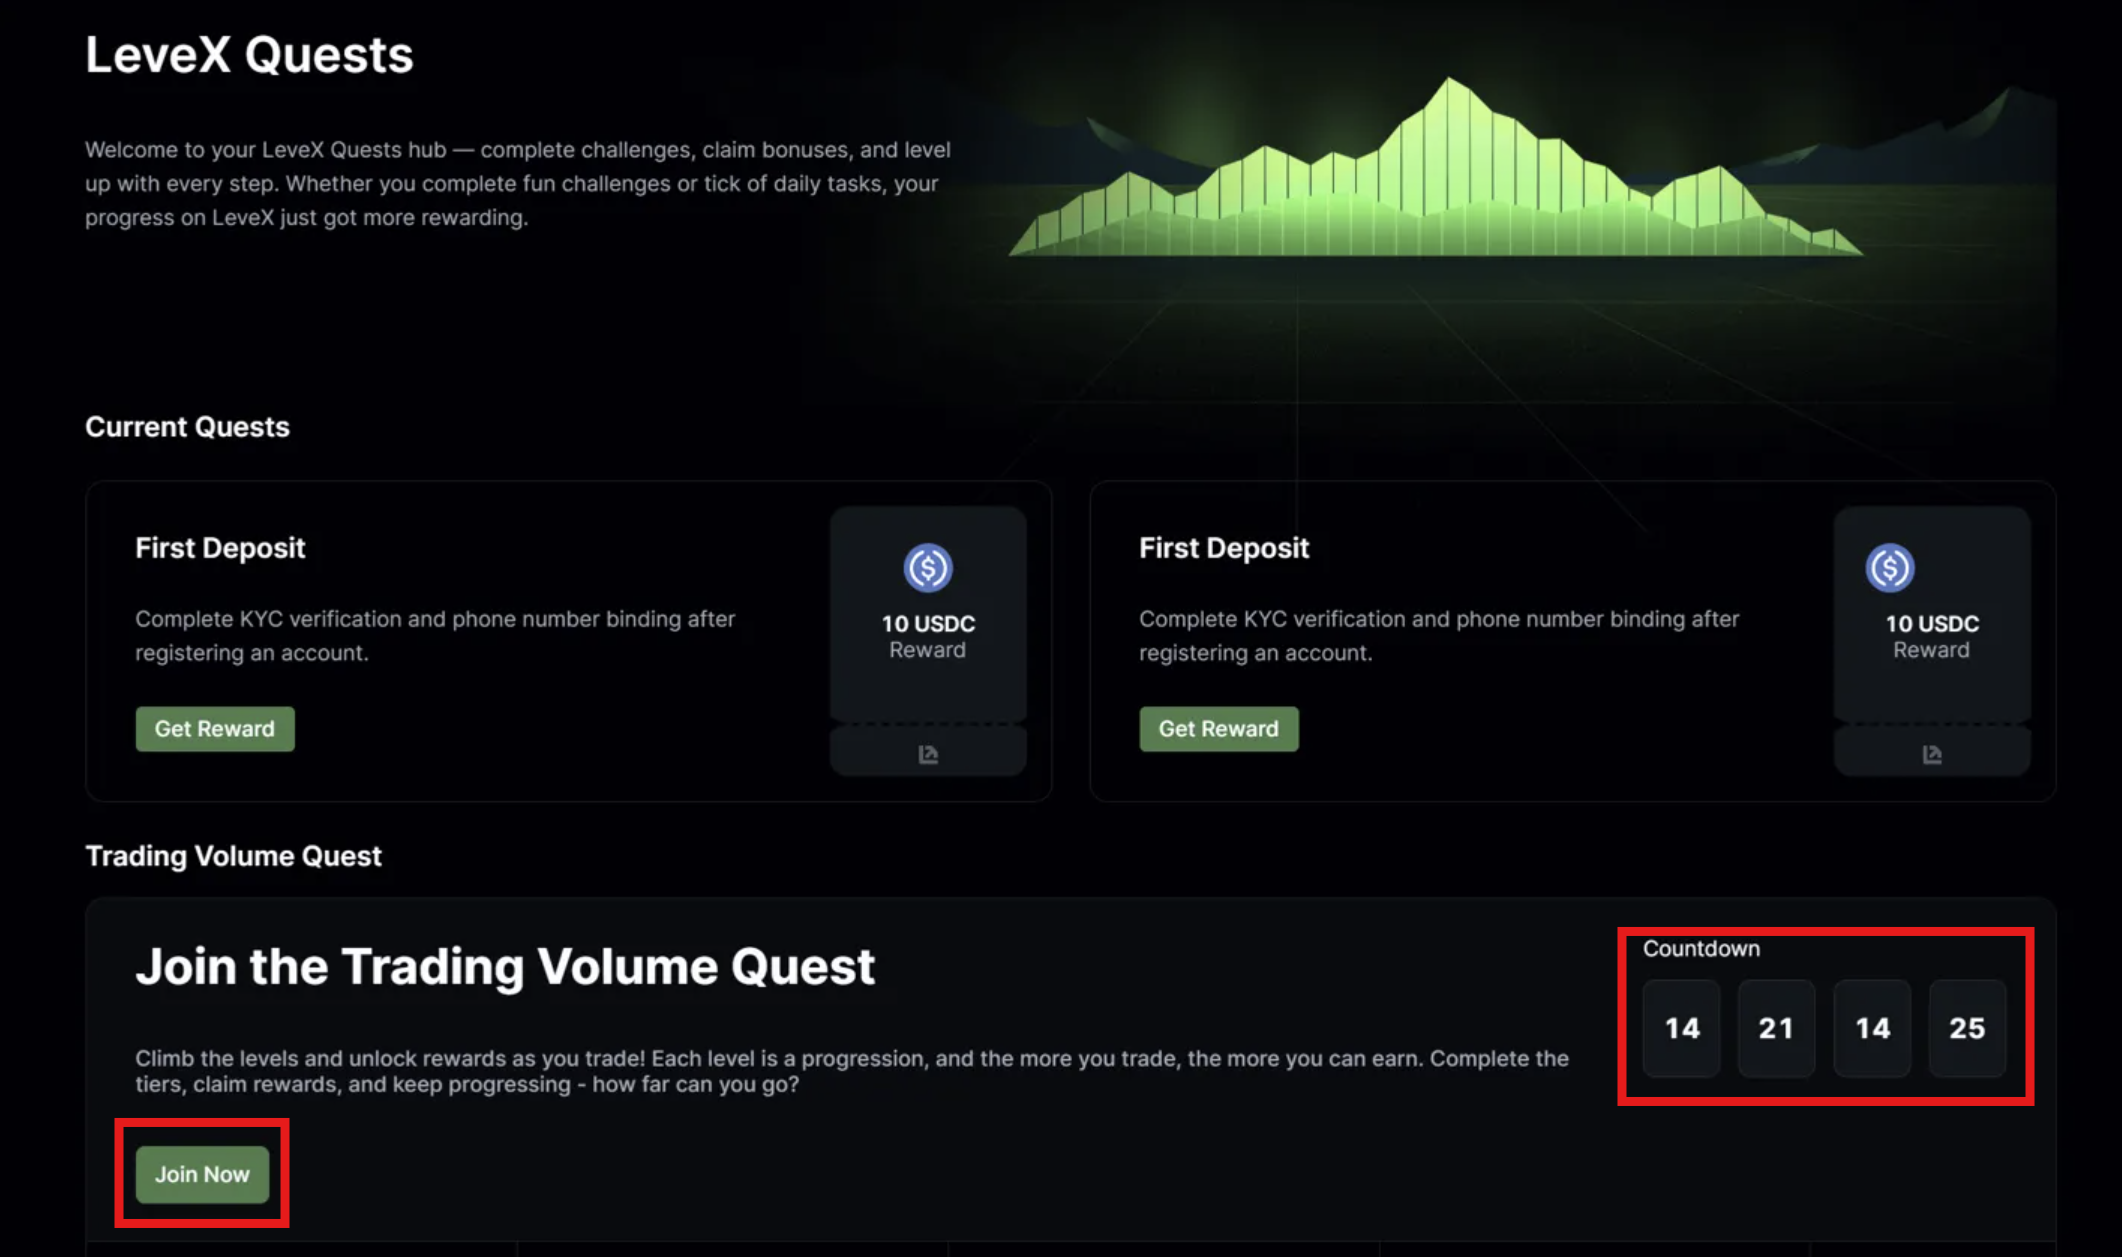
Step 2: Join the Trading Volume Quest
Click the "Join Now" button in the Trading Volume Quest section to opt-in to the Quest.
Step 3: Confirm Quest Participation
A confirmation popup appears showing you've successfully joined the Quest. Click "Start Trading" to go directly to the trading interface, or close the popup to continue exploring.

Step 4: Generate Trading Volume
Start trading to accumulate volume toward Quest tiers. Trade on spot markets or futures contracts - all legitimate trading activity counts toward your progression.
For detailed guidance on opening futures positions, see our complete futures trading guide.
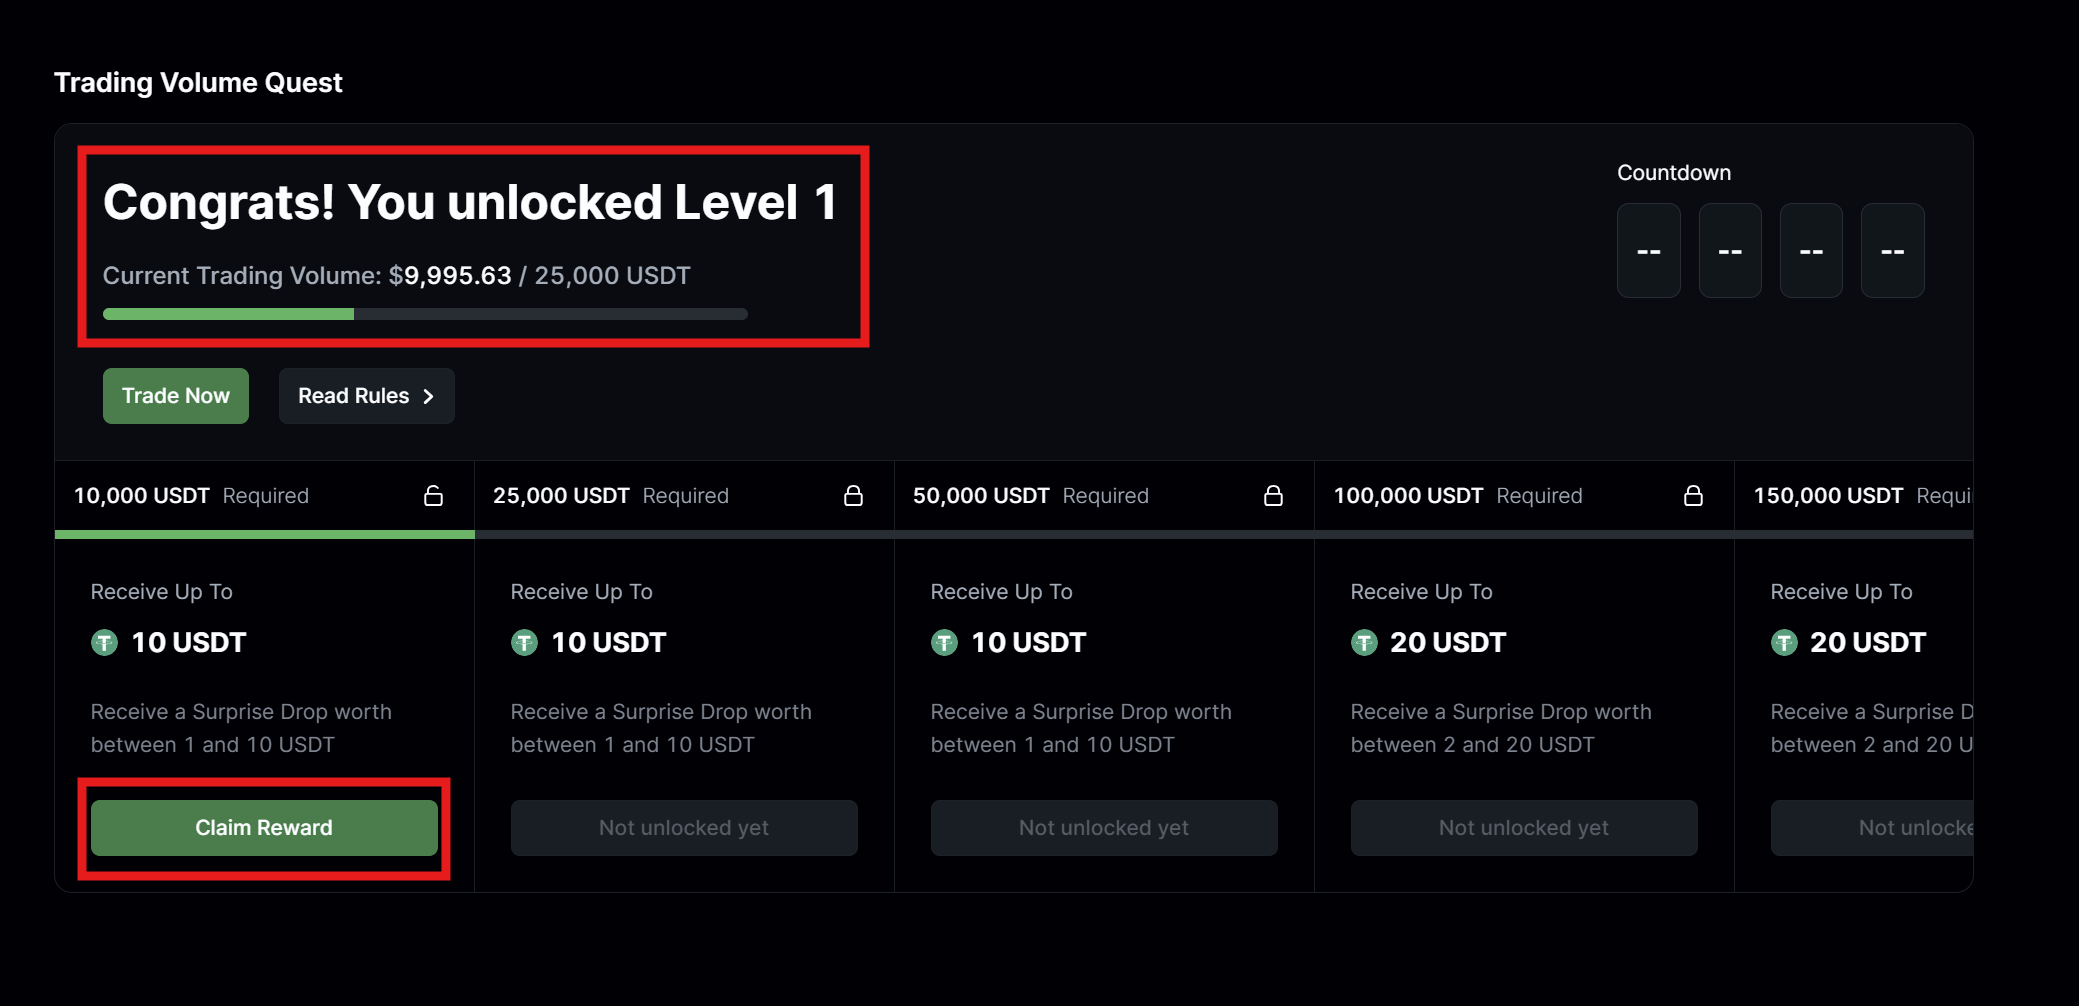
Step 5: Claim Your First Tier Reward
Return to the Quest page after trading. When you reach the first tier ($10,000 volume), click the "Claim Reward" button that becomes active on the completed tier.
Your progress bar will show your current volume and the tier will display "Claim Reward" instead of being grayed out.
Step 6: Click View Rewards in Popup
A popup appears showing "You've received a Surprise Drop" with details about visiting your Rewards page to receive up to 10.00 USDT in prizes. Click "View Rewards" to proceed to your rewards dashboard.

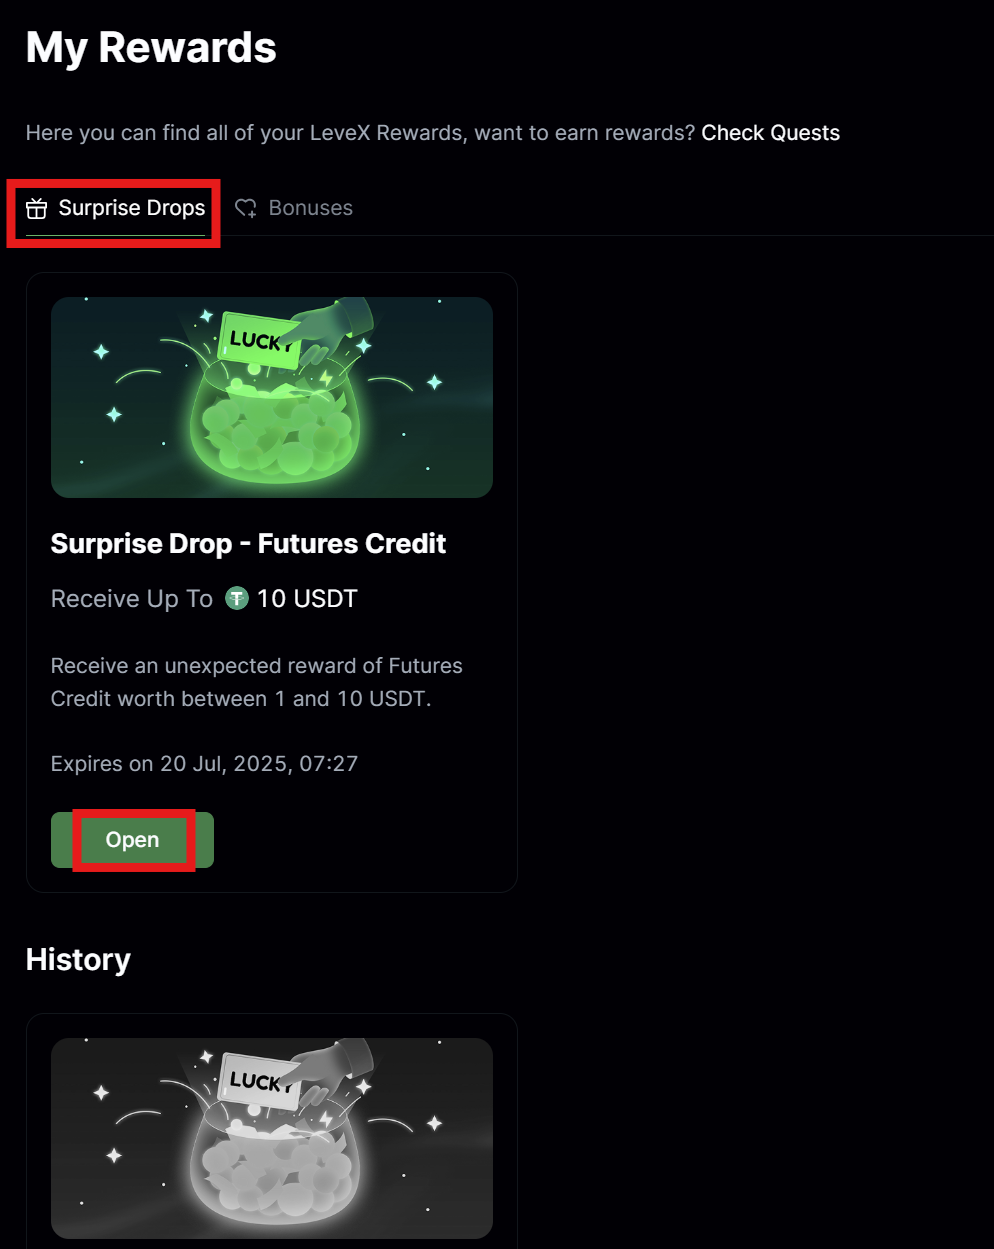
Step 7: Open Your Surprise Drop
On the My Rewards page, you'll be in the "Surprise Drops" tab by default. Find your new Surprise Drop reward and click the "Open" button to reveal your randomized reward amount.
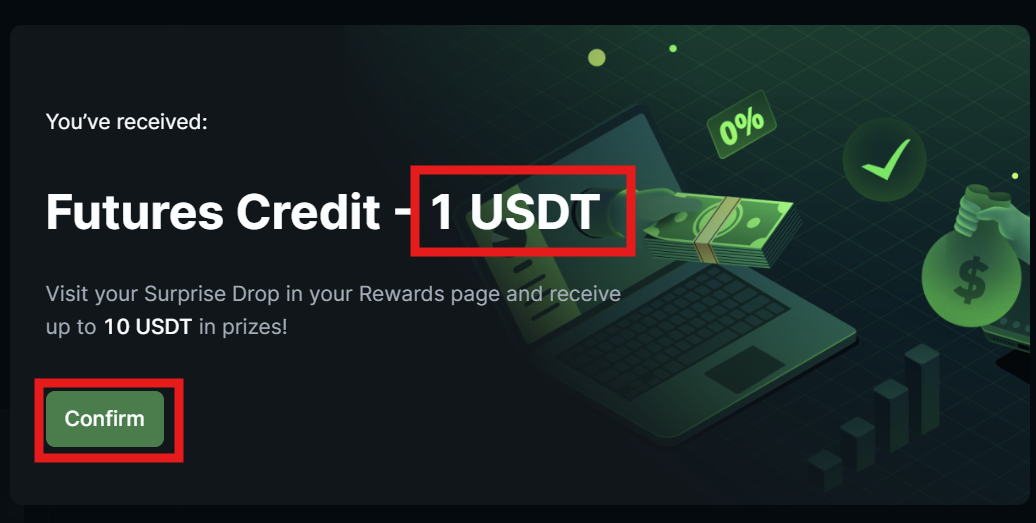
Step 8: Confirm Your Surprise Drop Amount
A popup shows your specific reward amount (e.g., "Futures Credit - # USDT"). Click "Confirm" to accept the Surprise Drop and add it to your available bonuses.
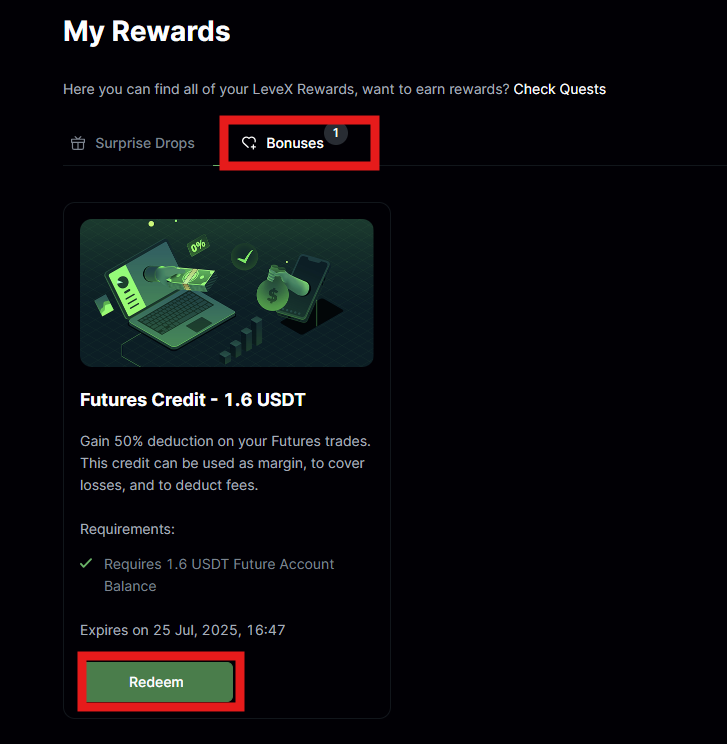
Step 9: Switch to Bonuses Tab and Redeem
Click the "Bonuses" tab in the My Rewards page. Find your new Futures Credit bonus (e.g., "Futures Credit - 1.6 USDT") and click the "Redeem" button to activate it for trading.
Step 10: Confirm Futures Credit Activation
A final popup confirms your Futures Credit has been activated. Click "Trade Now" or close the popup.
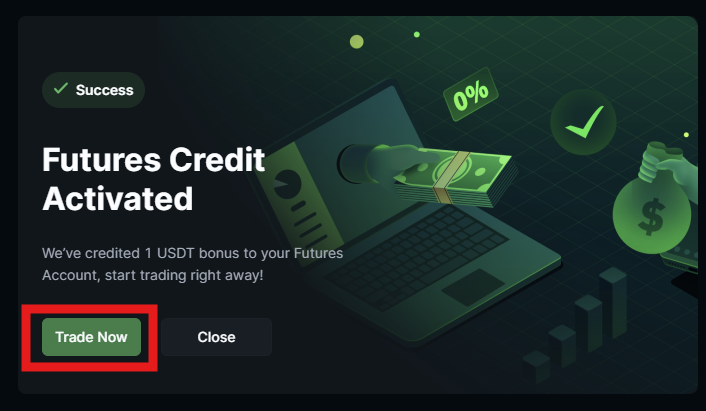
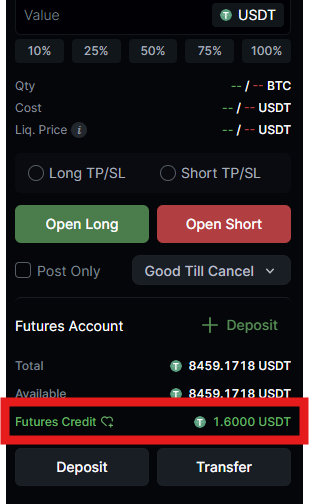
The credit will automatically apply to your futures trading to help offset fees and provide additional margin protection.
Quest Reward Timing Rules
Claiming Period - 7 days to claim Surprise Drop rewards after unlocking them
Redemption Window - 3 days to redeem bonuses after claiming
Active Usage - 7 days to use Futures Credit after redemption
Quest Expiration - All unclaimed rewards are forfeited when Quest periods end
Tips for Quest Success
Join Immediately - Opt-in as soon as Quests launch since past volume doesn't count retroactively
Monitor Progress - Check your Quest page regularly to claim rewards before they expire
Plan Usage - Use Futures Credit strategically rather than treating it as "free money" for reckless trades
Consistent Activity - Steady trading throughout Quest periods typically generates more rewards than sporadic high-volume sessions
For additional questions about Quest participation, visit our Quest FAQ or contact LeveX support for assistance.