
This guide will show you how to enhance the security of your LeveX account by enabling two-factor authentication (2FA) and anti-phishing protection.
Requirements Before Starting
- A registered LeveX account (How to register an account on LeveX)
- A smartphone with Google Authenticator or another compatible authentication app installed
Part 1: Setting Up Two-Factor Authentication (2FA)
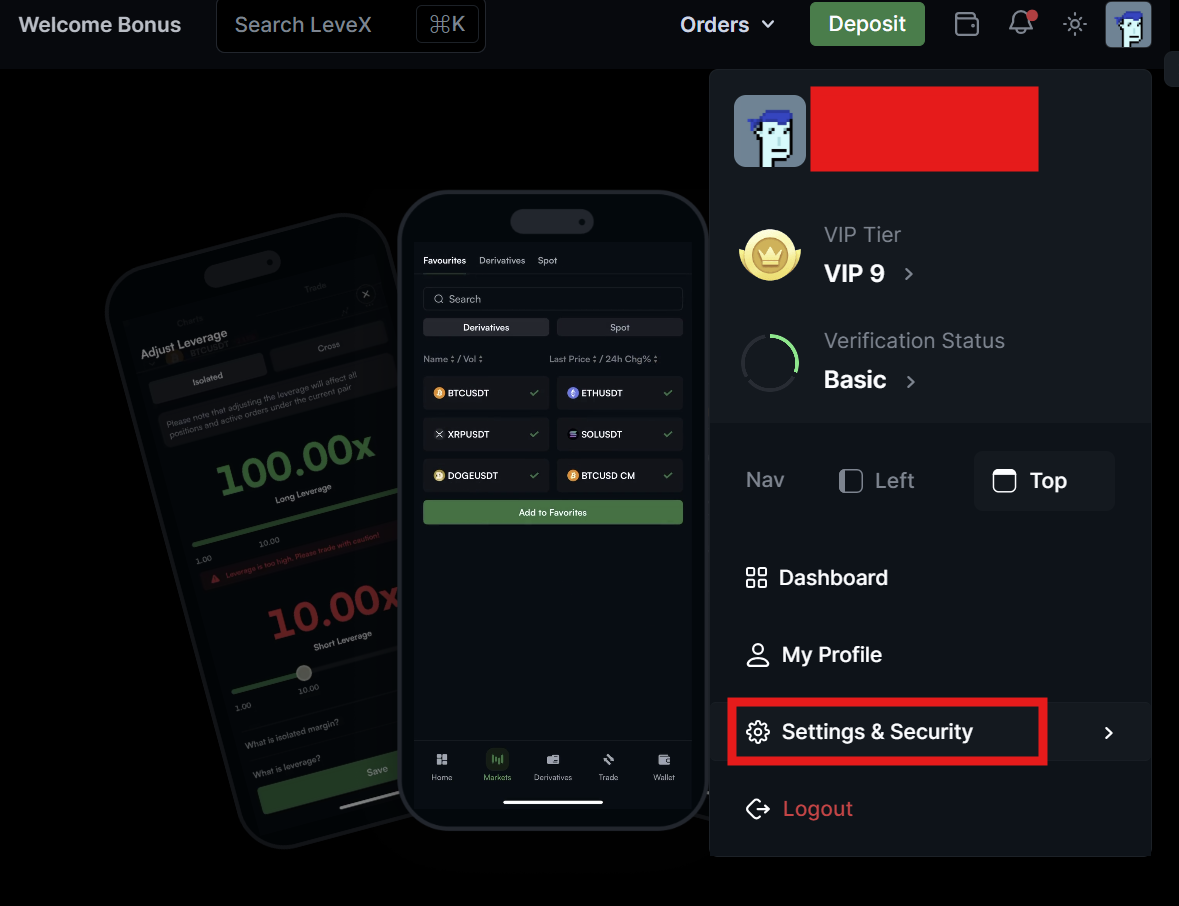
Step 1: Access Your Account Settings
- Go to the LeveX homepage
- Hover over your profile icon in the top right corner
- Select Settings & Security from the dropdown menu
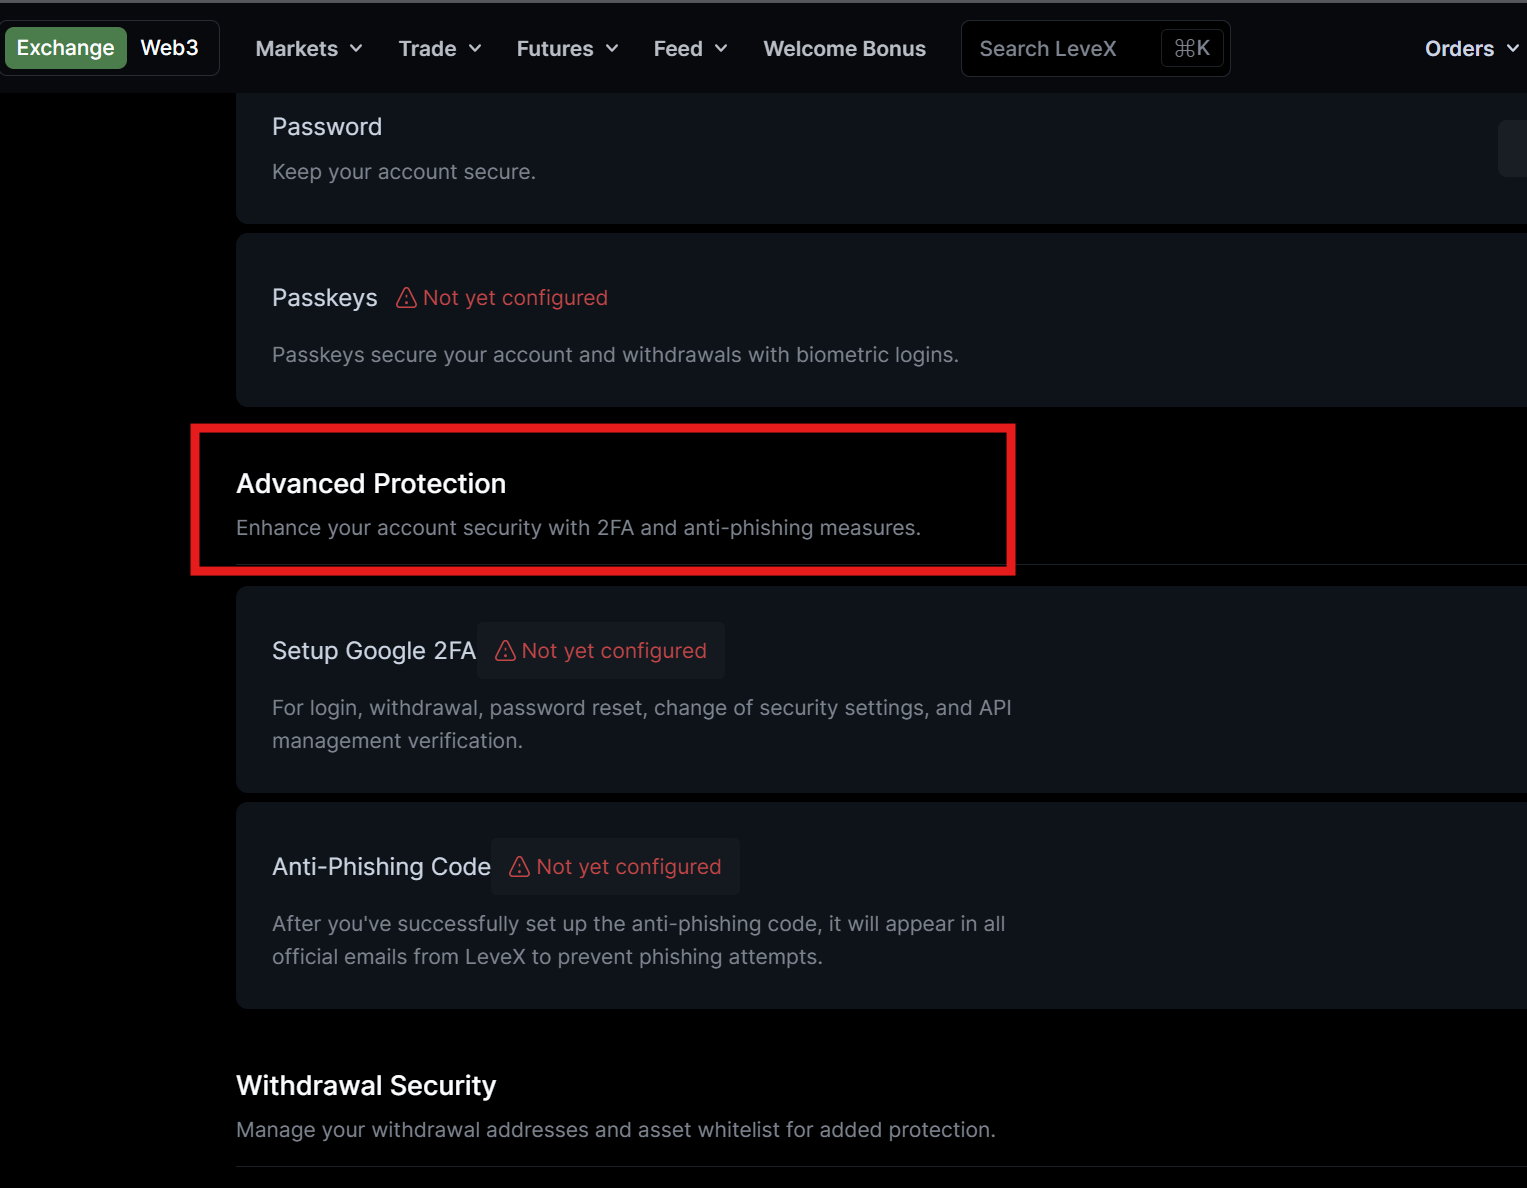
Step 2: Navigate to Security Settings
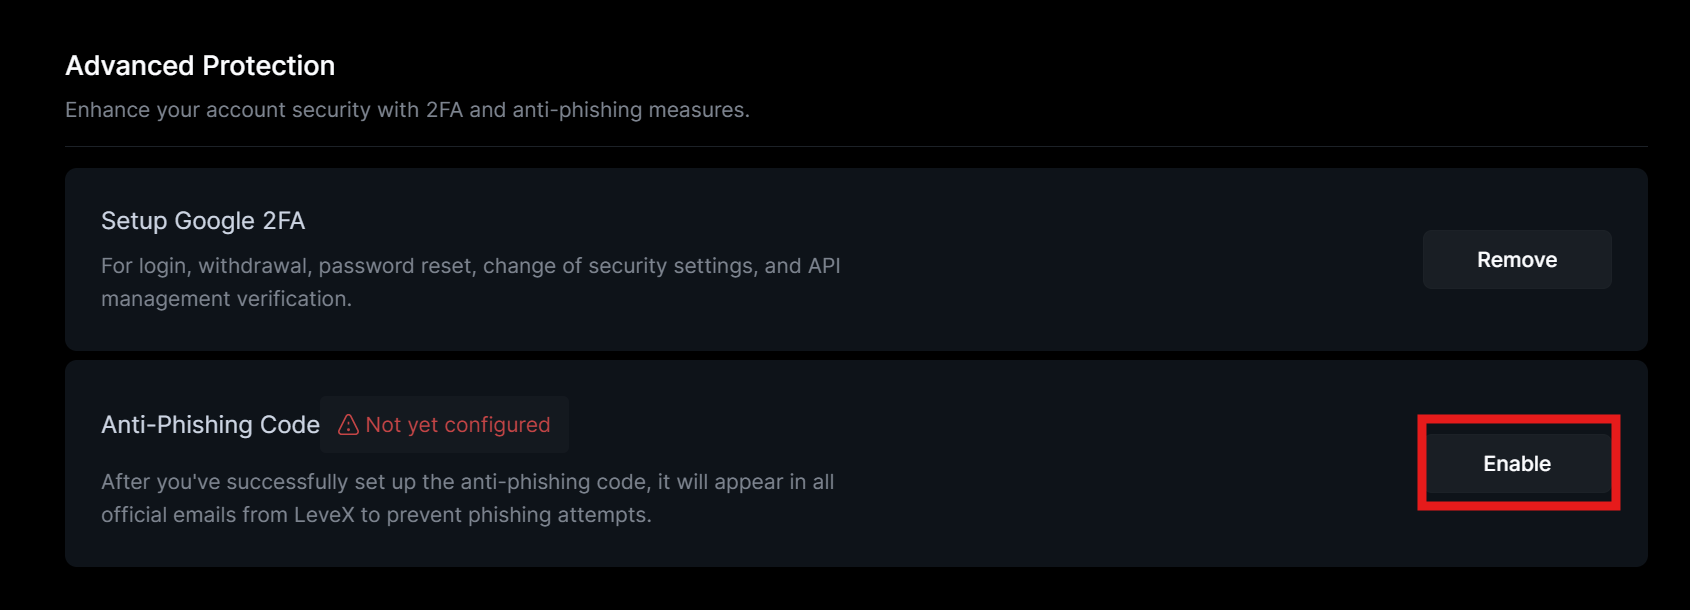
In your account settings page, find the "Advanced Protection" section.
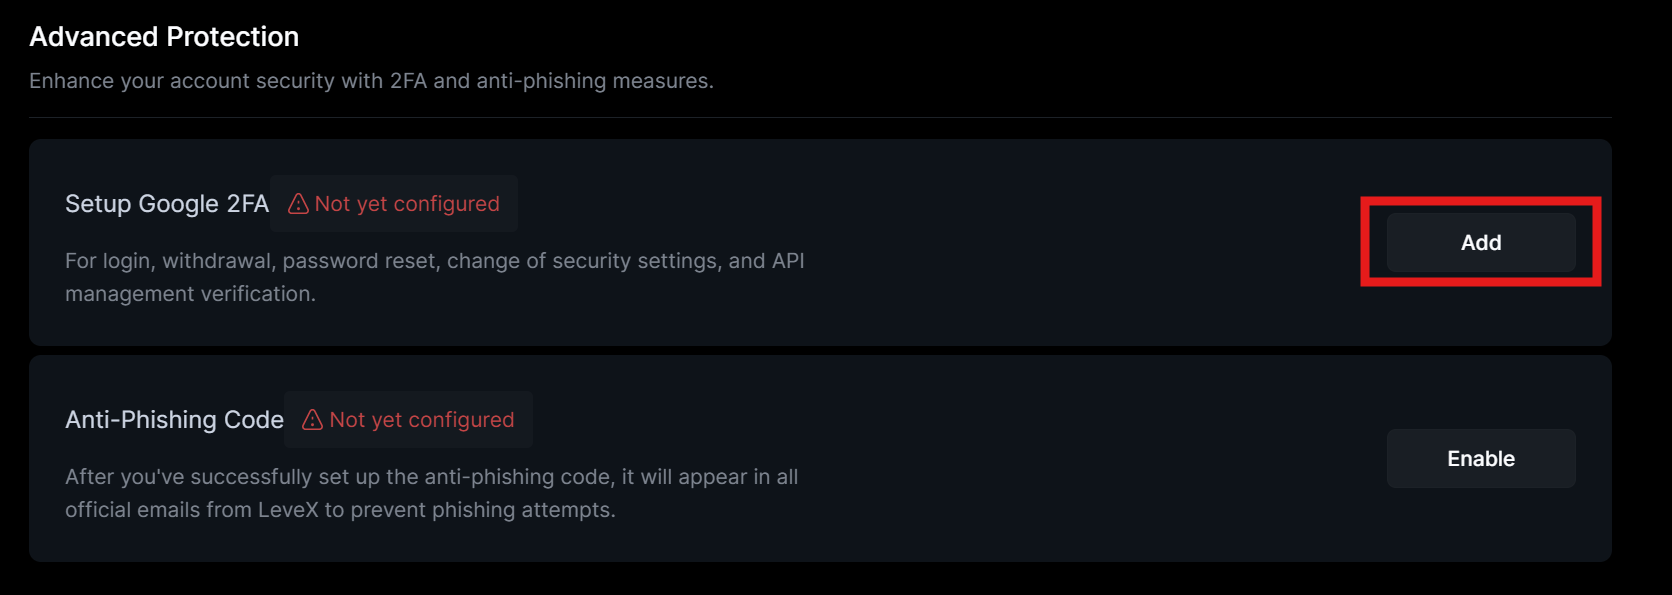
Step 3: Enable Google Authenticator
- Click "Add" next to Google Authenticator
- You'll see a popup with instructions for setting up Google Authenticator
Step 4: Download the Authenticator App
- If you haven't already, download Google Authenticator from the App Store (iOS) or Google Play Store (Android)
- Open the app on your smartphone
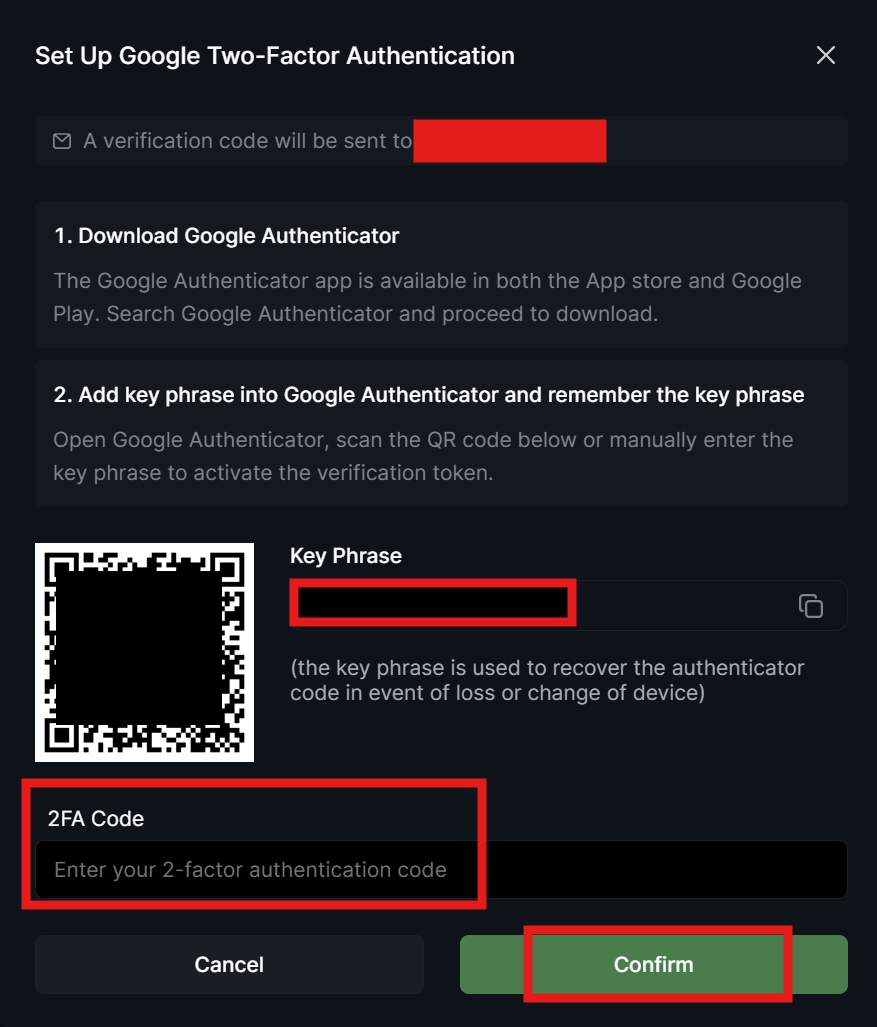
Step 5: Link the Authenticator App to Your LeveX Account
- In the Google Authenticator app, tap "+" to add a new account
- Either:
- Scan the QR code displayed on your LeveX screen, or
- Manually enter the key phrase provided on the screen
- Make sure to save or write down your key phrase in a secure location - you'll need it if you ever change or lose your device
Step 6: Enter Verification Code
- The Google Authenticator app will generate a 6-digit code
- Enter this code in the "2FA Code" field on the LeveX website
- Click "Confirm"
Step 7: Complete Setup
Once verified, you'll receive confirmation that 2FA has been successfully enabled on your account.
Part 2: Setting Up Anti-Phishing Protection
Step 1: Return to Account Settings
Go back to your Settings & Security page if you're not already there.
Step 2: Find Anti-Phishing Code Section
Look for the "Anti-Phishing Code" section in the security settings.
Step 3: Enable Your Anti-Phishing Code
Click "Enable" next to Anti-Phishing Code
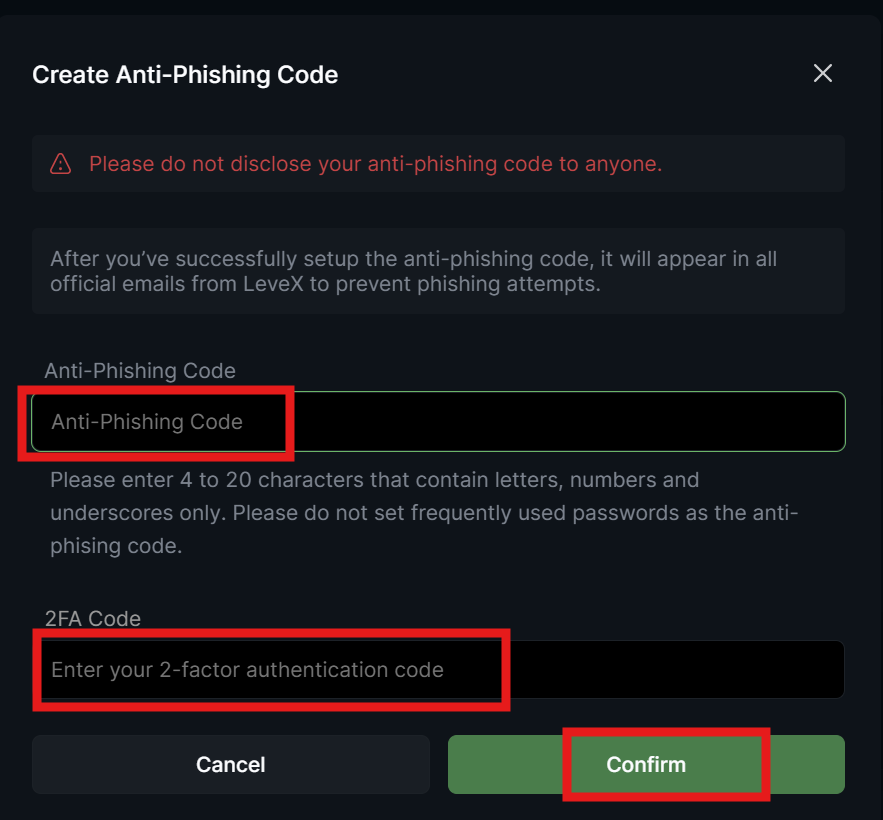
Step 4: Set and Save Your Anti-Phishing Code
- Create a unique word or phrase that will appear in all legitimate emails from LeveX
- Make sure to choose something memorable but not easily guessable
- After you enter you newly set up 2FA code, click "Confirm" to set your anti-phishing code.
How to Use These Security Features
Using 2FA
- Each time you log in or perform sensitive actions (like withdrawals), you'll need to enter the current 6-digit code from your authenticator app
- Codes refresh every 30 seconds for maximum security
Using Anti-Phishing Protection
- Check for your anti-phishing code in every email you receive from LeveX
- If an email claims to be from LeveX but doesn't contain your code, it's likely a phishing attempt
- Never click links or provide information in response to emails missing your code
Important Security Tips
- Never share your 2FA codes or anti-phishing phrase with anyone
- Store your backup key phrase in a secure location
- If you get a new phone, use your key phrase to restore your authenticator app before discarding your old device
- Consider enabling email and SMS verification for additional security